Photo Editing · Lightroom for Beginners
3 Easy Steps to Edit Any Photo
Are you a photographer wanting to edit photos but feeling overwhelmed? Here are the 3 editing steps to make overwhelmed feel easy!
How Do You Edit Photos in Lightroom as a Beginner?
Start with three steps: fix the light, adjust the colors, then use the brush for small spots. That’s the order I follow in this post, and I’ll show you the exact settings from one of my own pictures, plus a before and after at the end.
01 — Light
Pull exposure, contrast and shadows up, gradually and with intention.
02 — Colors
Temp, tint, vibrance and saturation, then the Color Mixer and color grading.
03 — Brush
Paint over just the spots you want to change. The brush only affects what you paint.
01 — Light
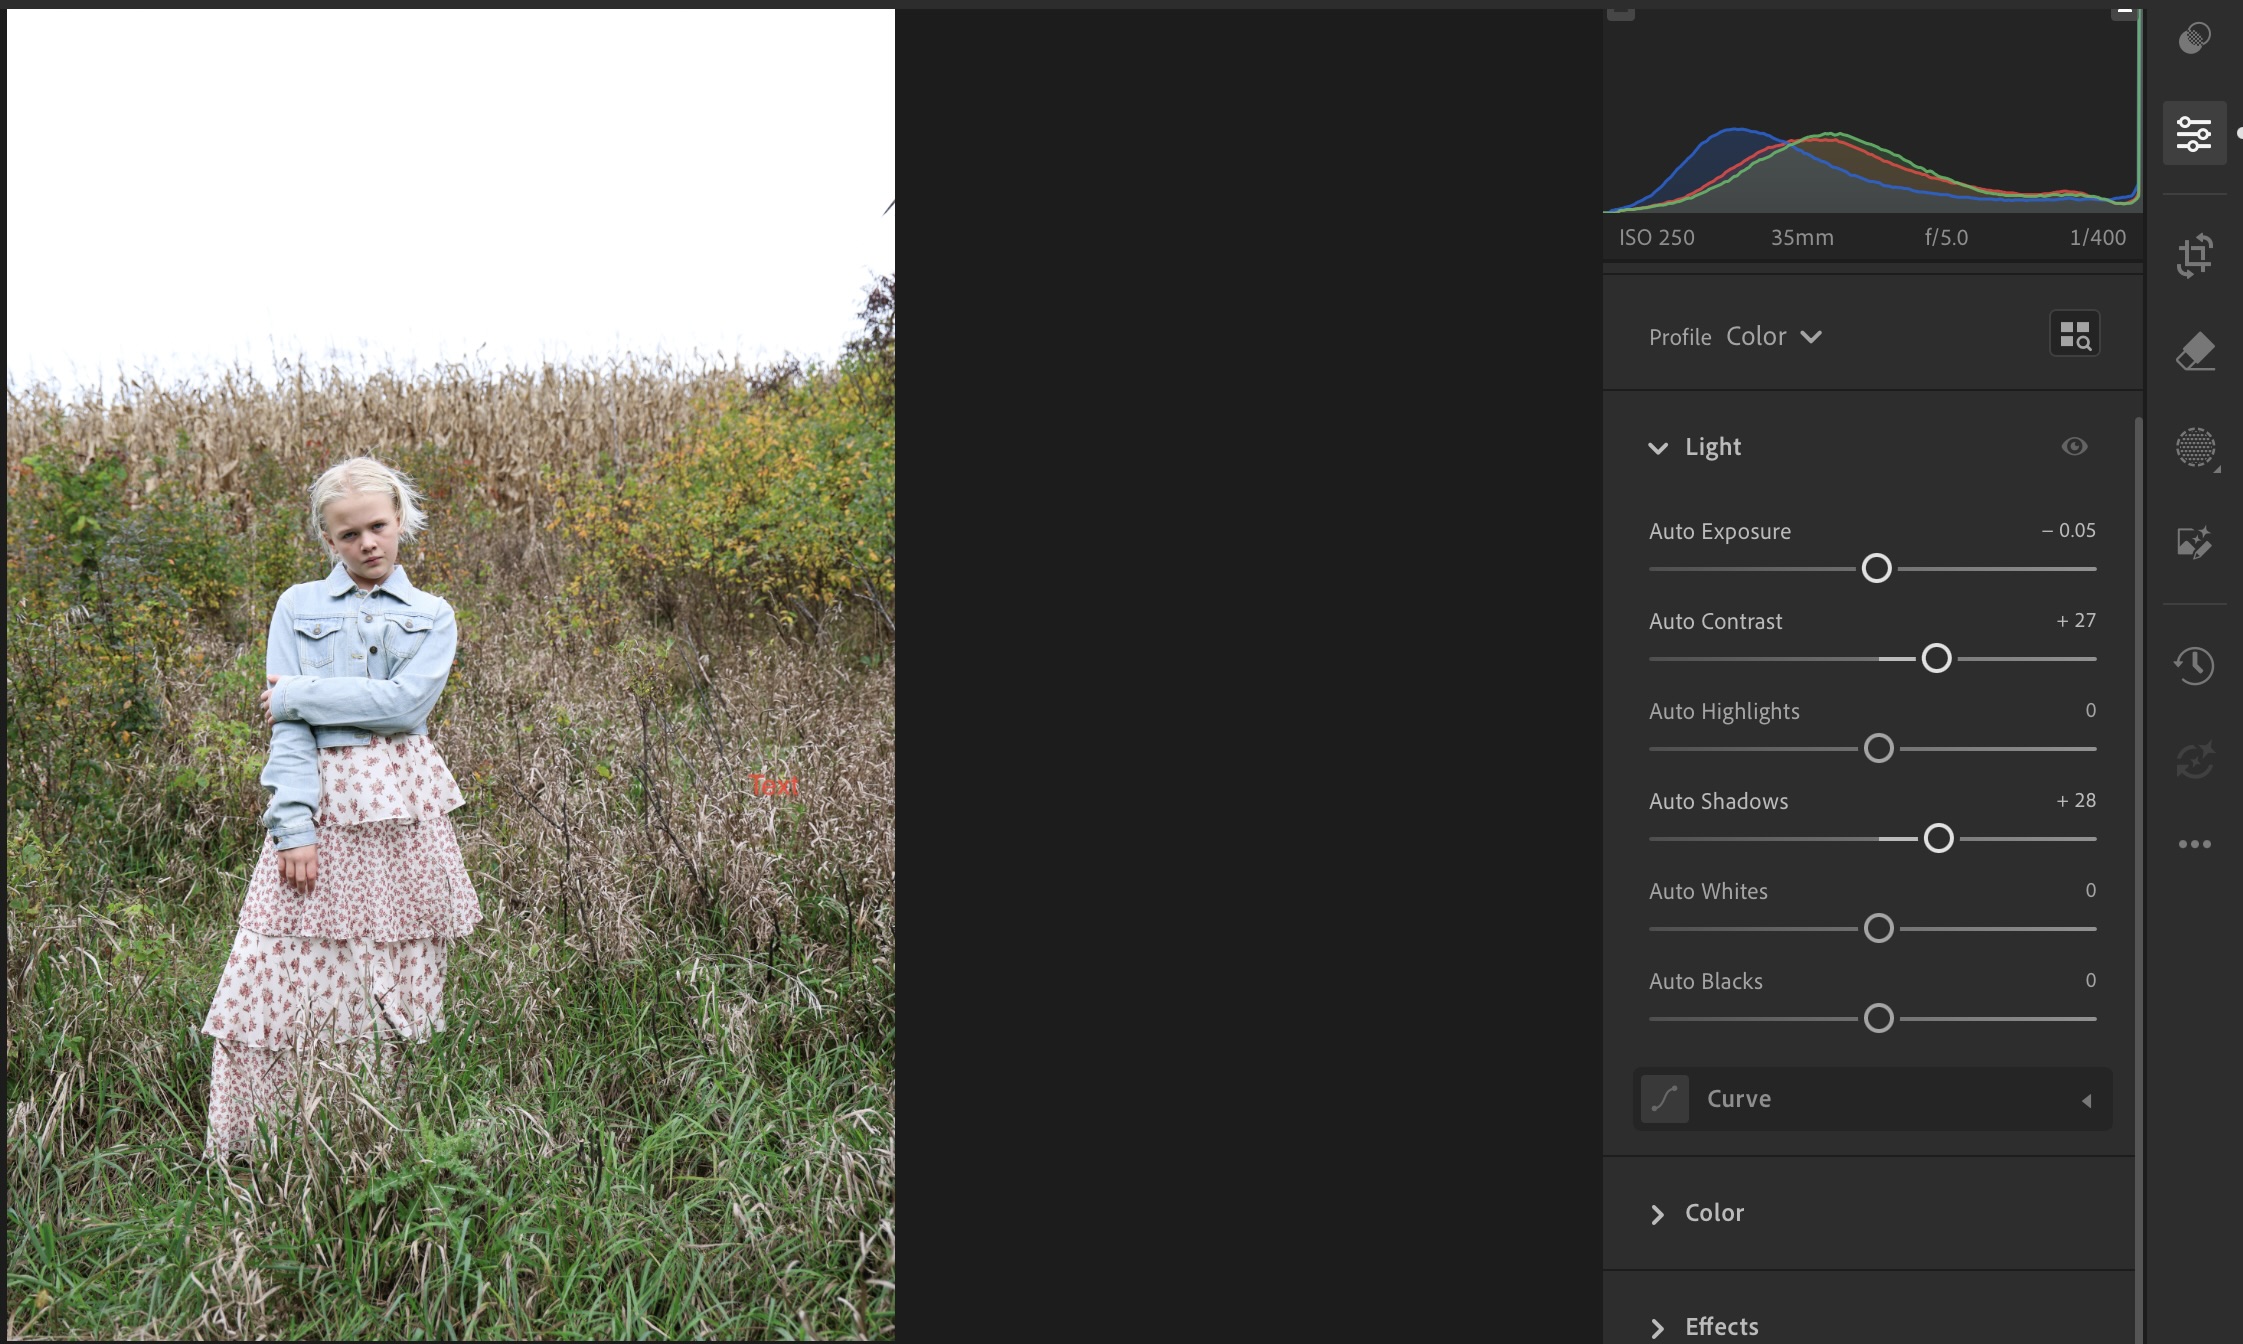
Step 1: Pull Contrast and Shadows Up(exposer if needed)
When you do this, it’s important not to move these settings drastically all at once. Instead, adjust them gradually and with intention.
Make subtle changes, moving them just enough to brighten and neutralize the image, so you can begin to see its true colors and depth.
My settings for this photo
Exposure −0.05, Contrast +27, Shadows +28. Highlights, Whites and Blacks stayed at 0.
02 — Colors
Step 2: Adjust the Colors
There are a few different ways to adjust colors that I want to talk about.
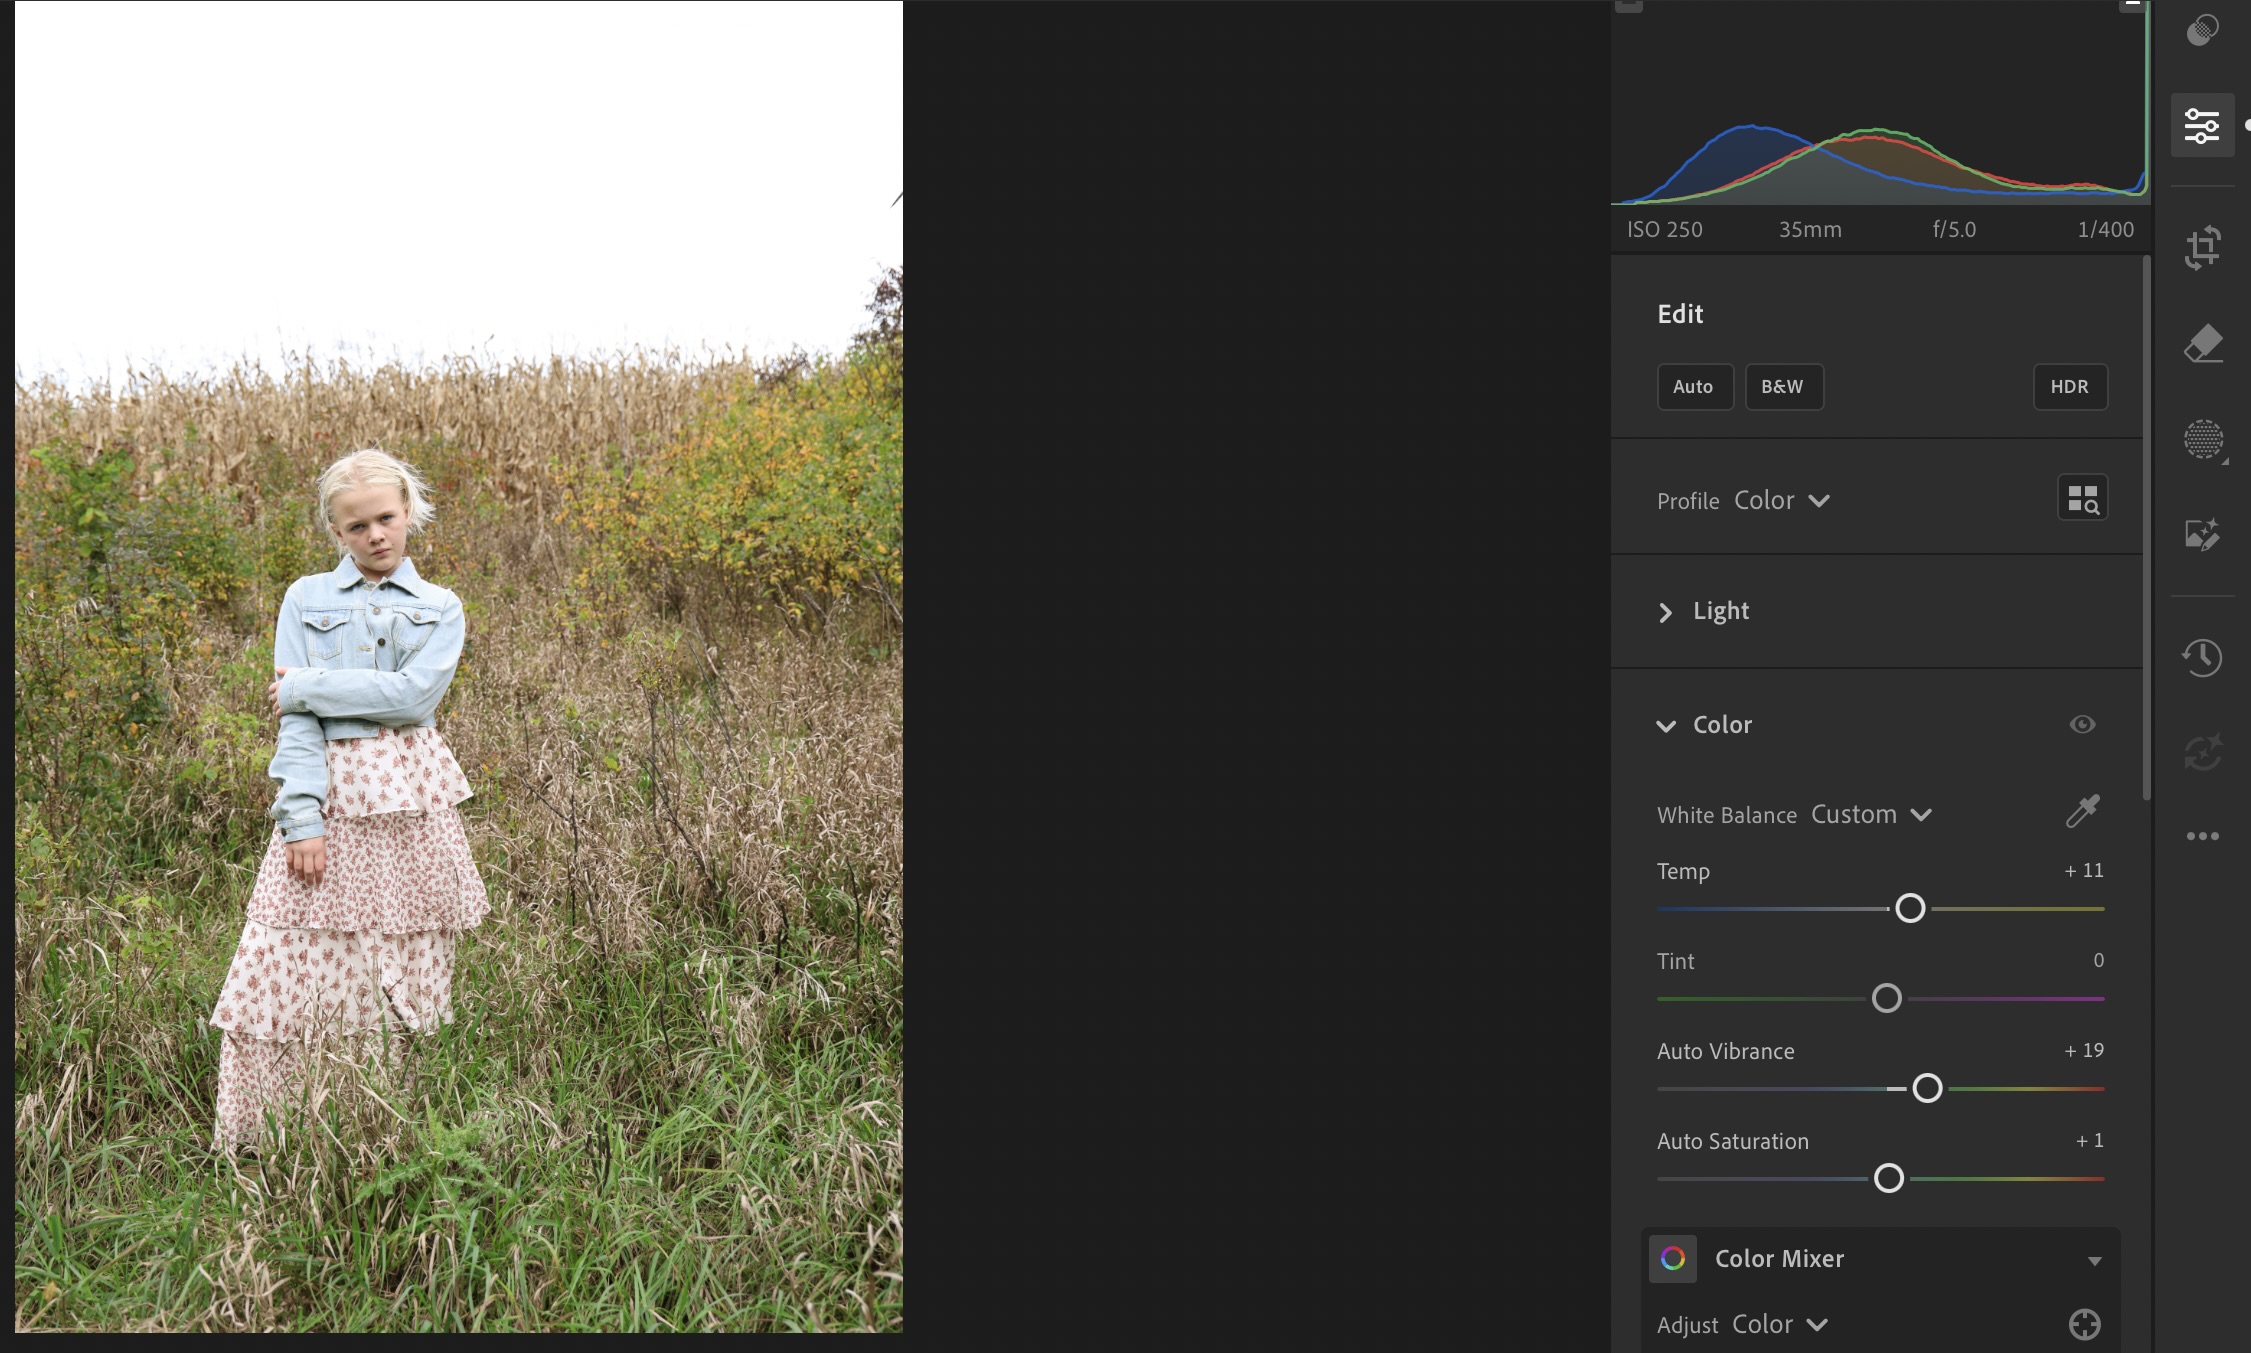
Temp, Tint, Vibrance and Saturation
These are your four main settings that adjust the whole photo. They are called umbrella edits. So if you change the tint, it changes the tint of the whole image, not one specific spot.
The temperature adds warmth to the photo (or coolness, if you slide it the other way). The tint shifts the colors toward green or magenta. Vibrance boosts the quieter colors in the image, and saturation boosts every color evenly.
My settings for this photo
Temp +11, Tint 0, Vibrance +19, Saturation +1.
02 — Colors, continued
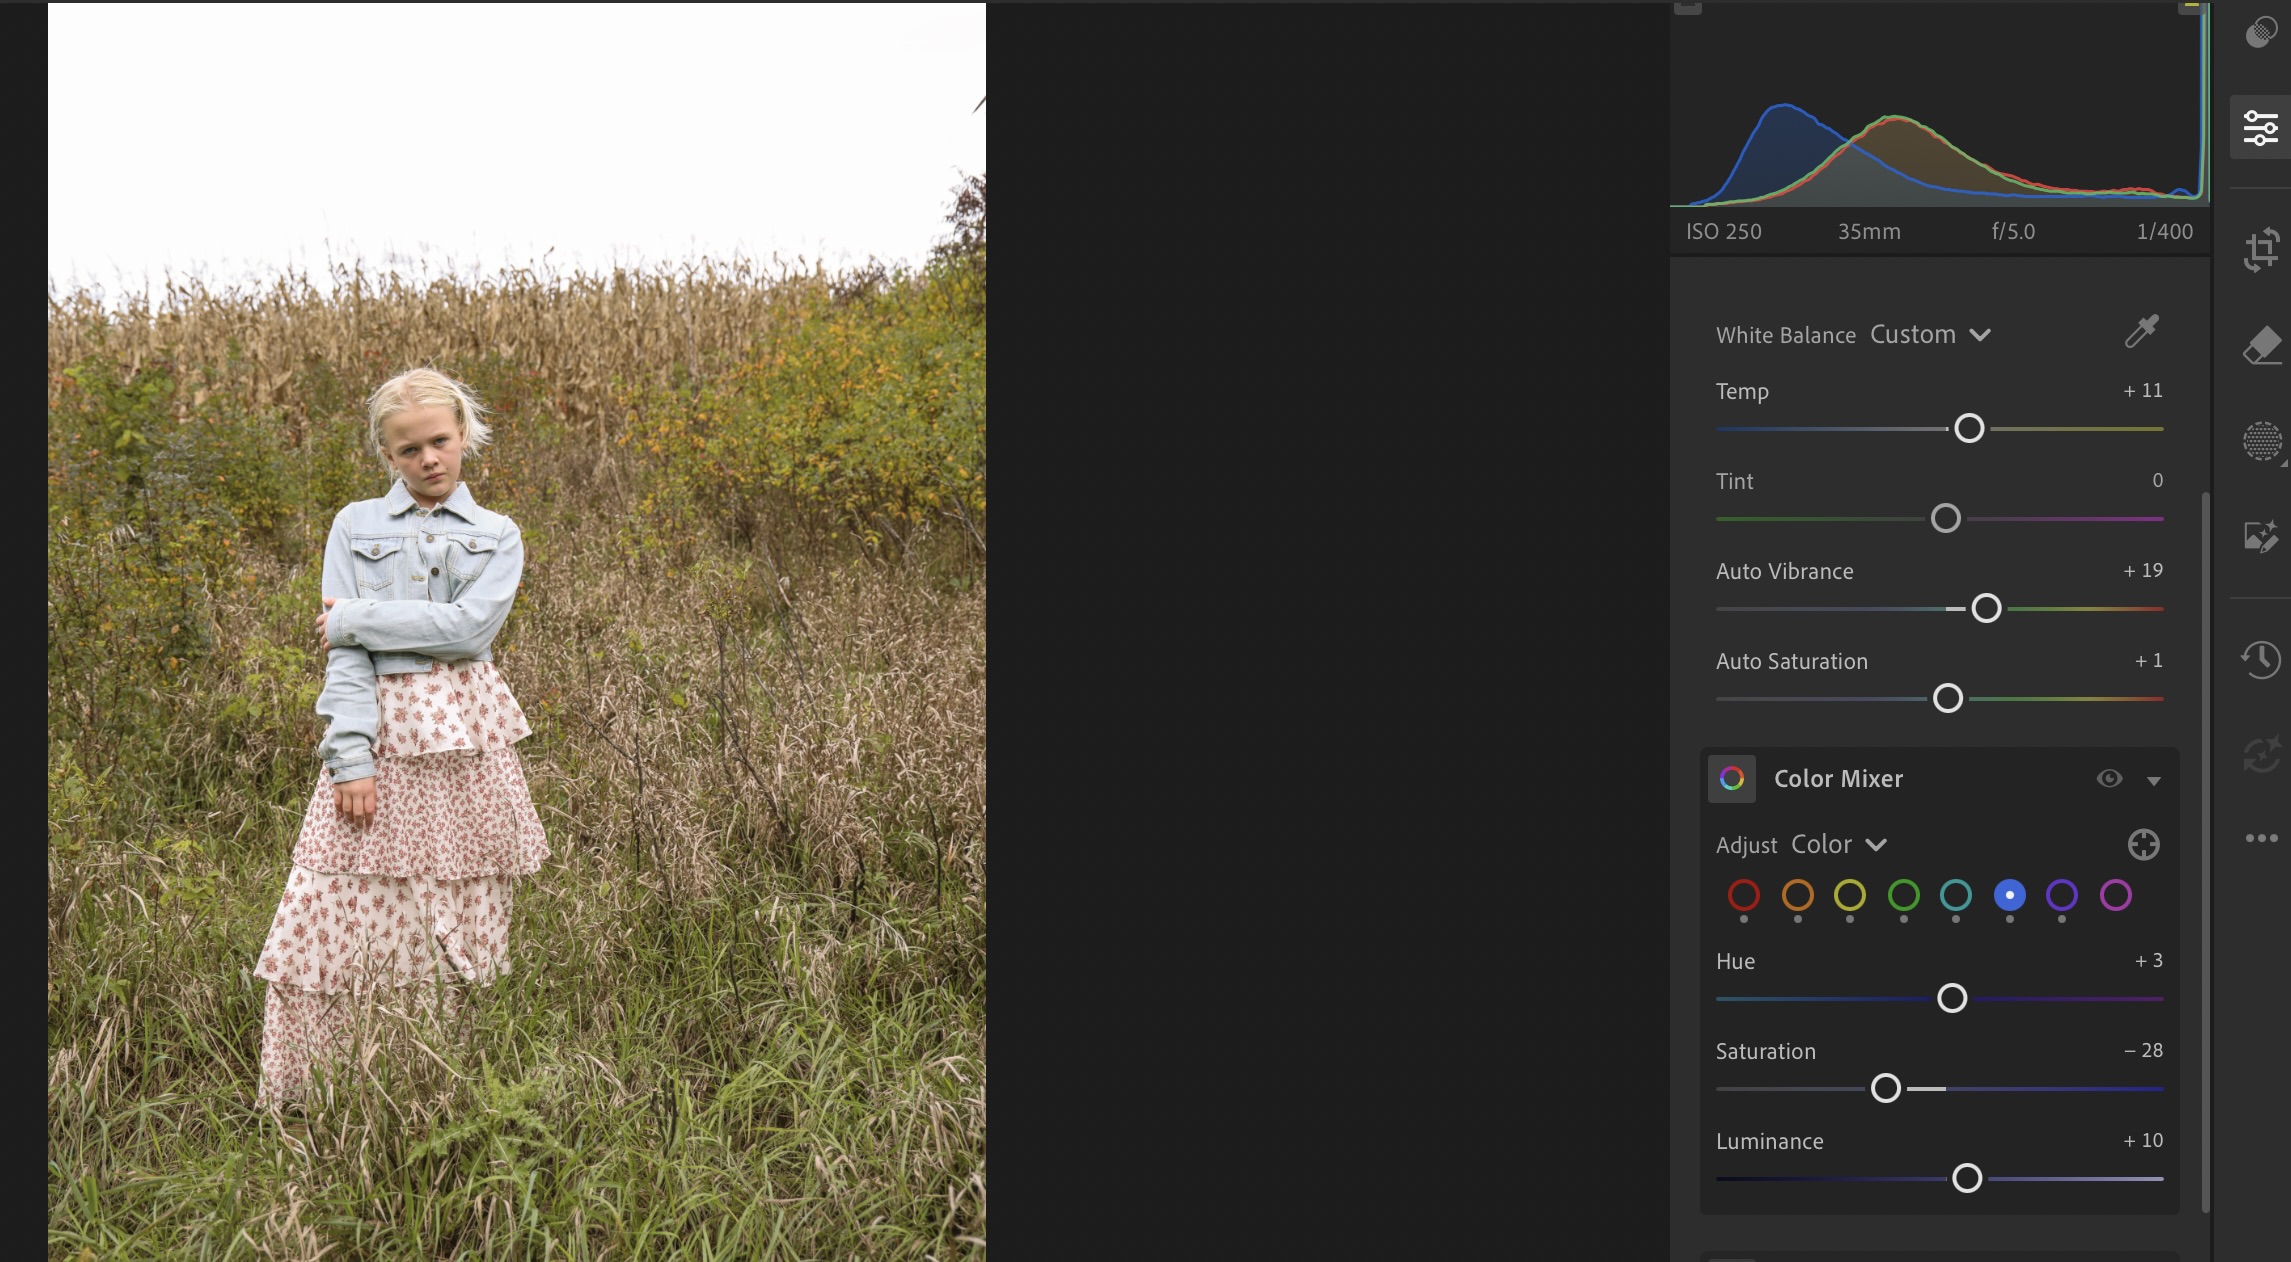
The Color Mixer (My Favorite!)
This one is my personal favorite because it lets you select a certain color in the image and adjust just that color! It gives you the options to adjust hue, saturation and luminance.
Hue changes the shade of the color, saturation changes how strong it is, and luminance changes how light or dark it is.
My settings for this photo
Blue: Hue +3, Saturation −28, Luminance +10.
02 — Colors, continued
Color Grading
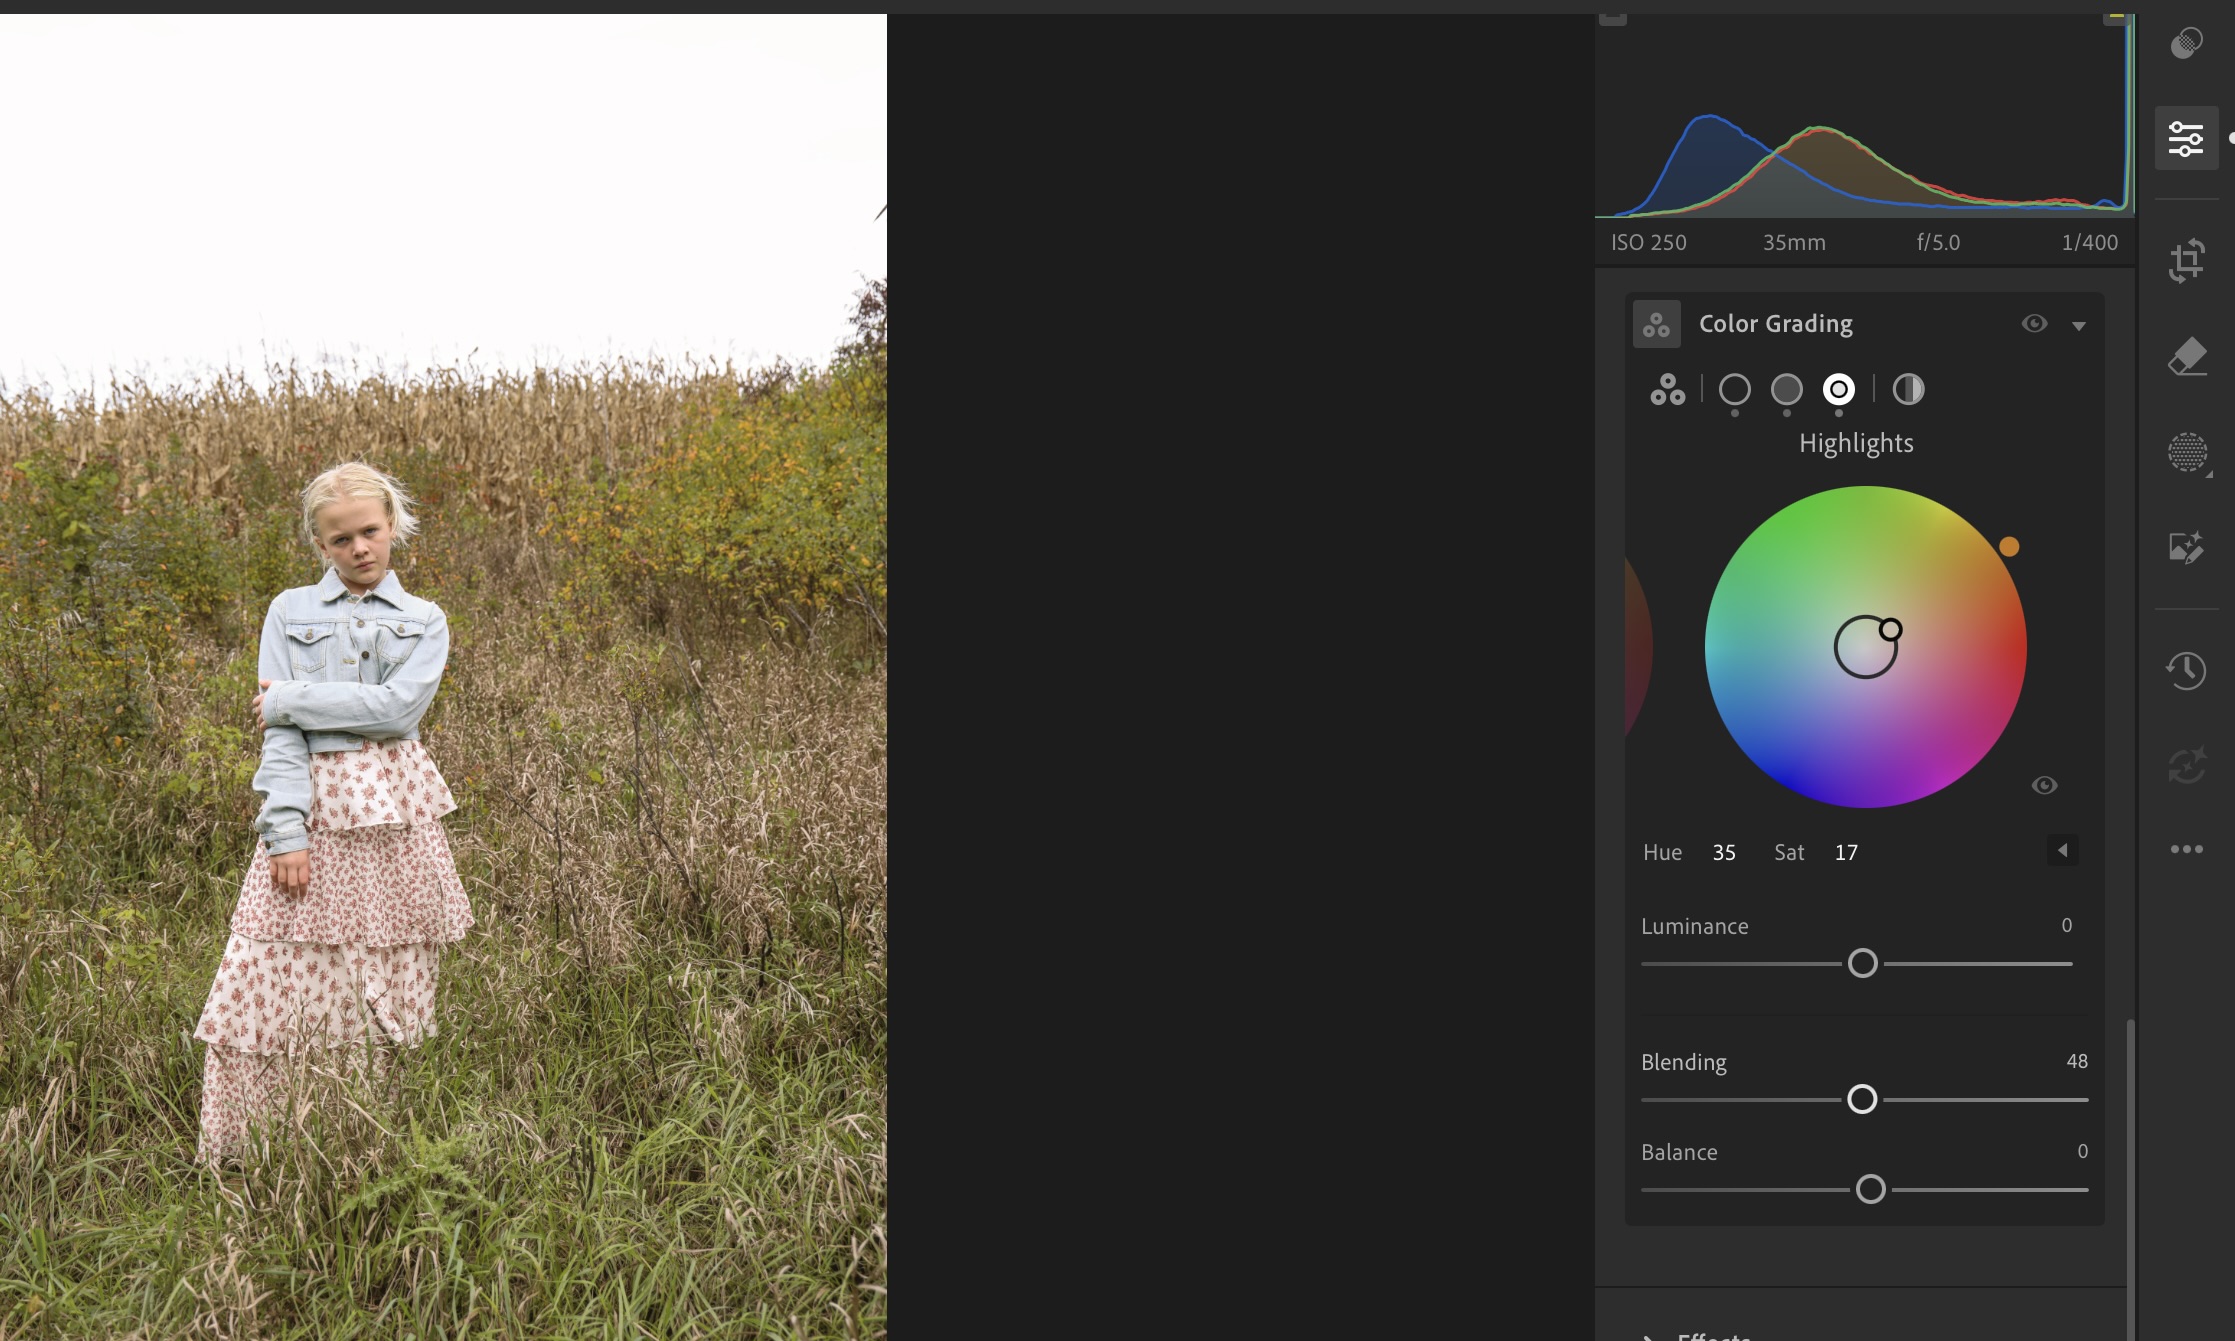
This is in the drop-down of the Color section, and it affects 3 things: midtones, highlights and shadows.
Color grading adds a color tint to just the bright parts, the middle tones or the dark parts of your photo.
For the final image of this picture, I set the highlights to a hue of 35 and a saturation of 17.
03 — Brush
Step 3: How to Use the Brush in Lightroom
To use the brush in Lightroom, follow these steps:
- Open Lightroom and go to the Edit panel by clicking “Edit” in the right sidebar.
- Click the Masking icon in the toolbar (it looks like a dotted circle) and choose Brush.
- Adjust the brush size and feather using the sliders. A larger brush covers more area, while a smaller brush gives you precision.
- Paint over the areas you want to adjust. The brush will only affect the areas you paint.
- Set the adjustments you want, like exposure and contrast, using the sliders below the brush settings.
Want more detail? Adobe has a full guide to masking in Lightroom.
Behind the shot
My Camera Settings
250
ISO
f/5
Aperture
1/400
Shutter
35mm
Focal length
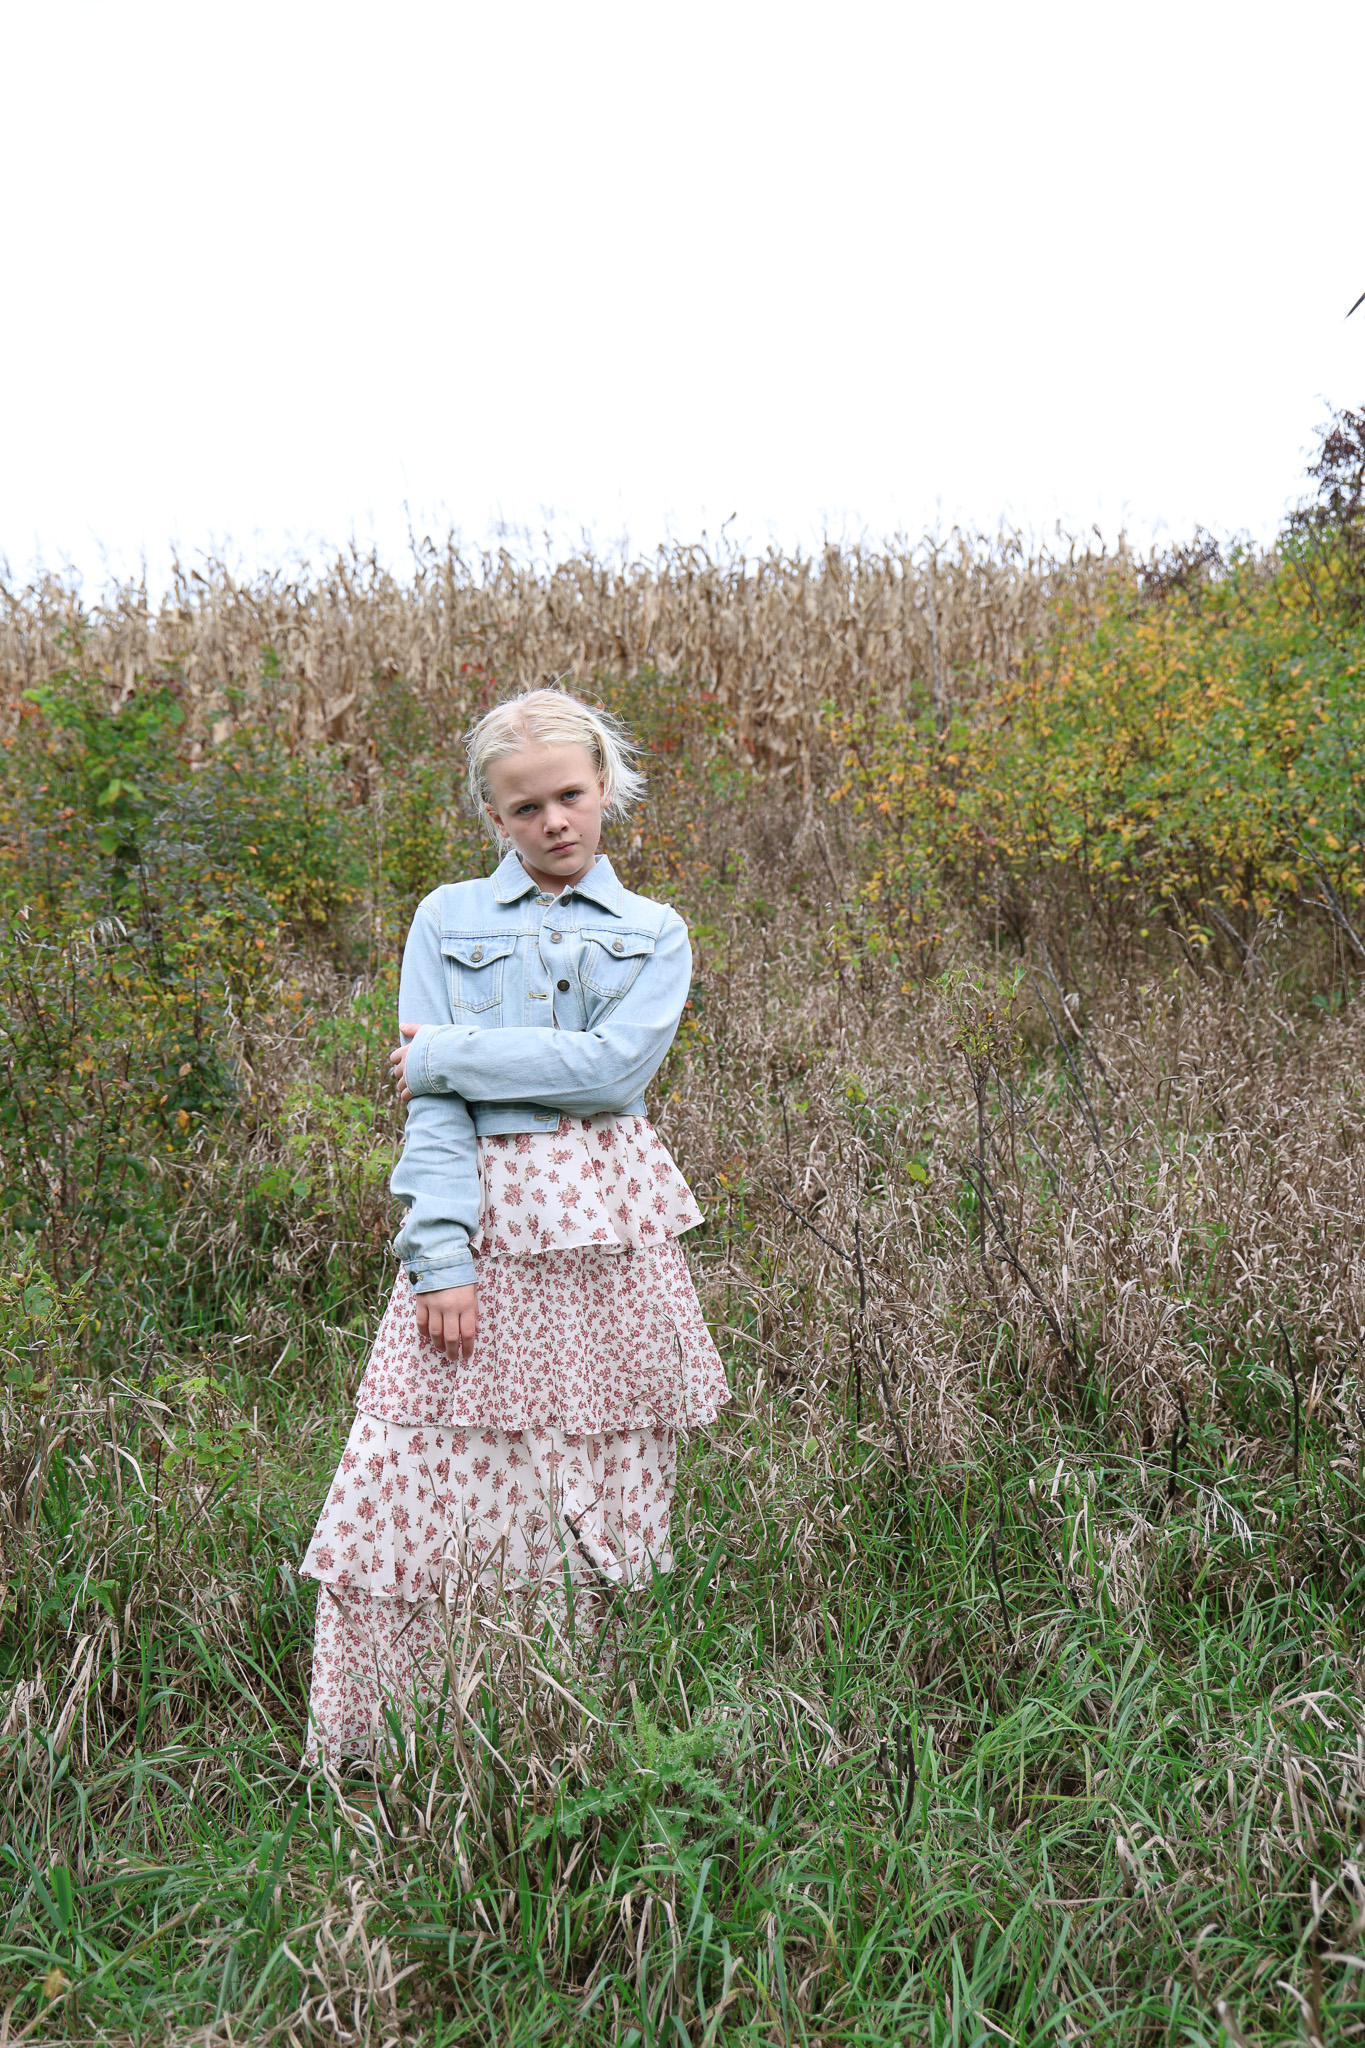
These are the camera settings for the before-and-after photo below, taken on a Canon EOS R6 Mark III.
04 — Before and After
Before and After
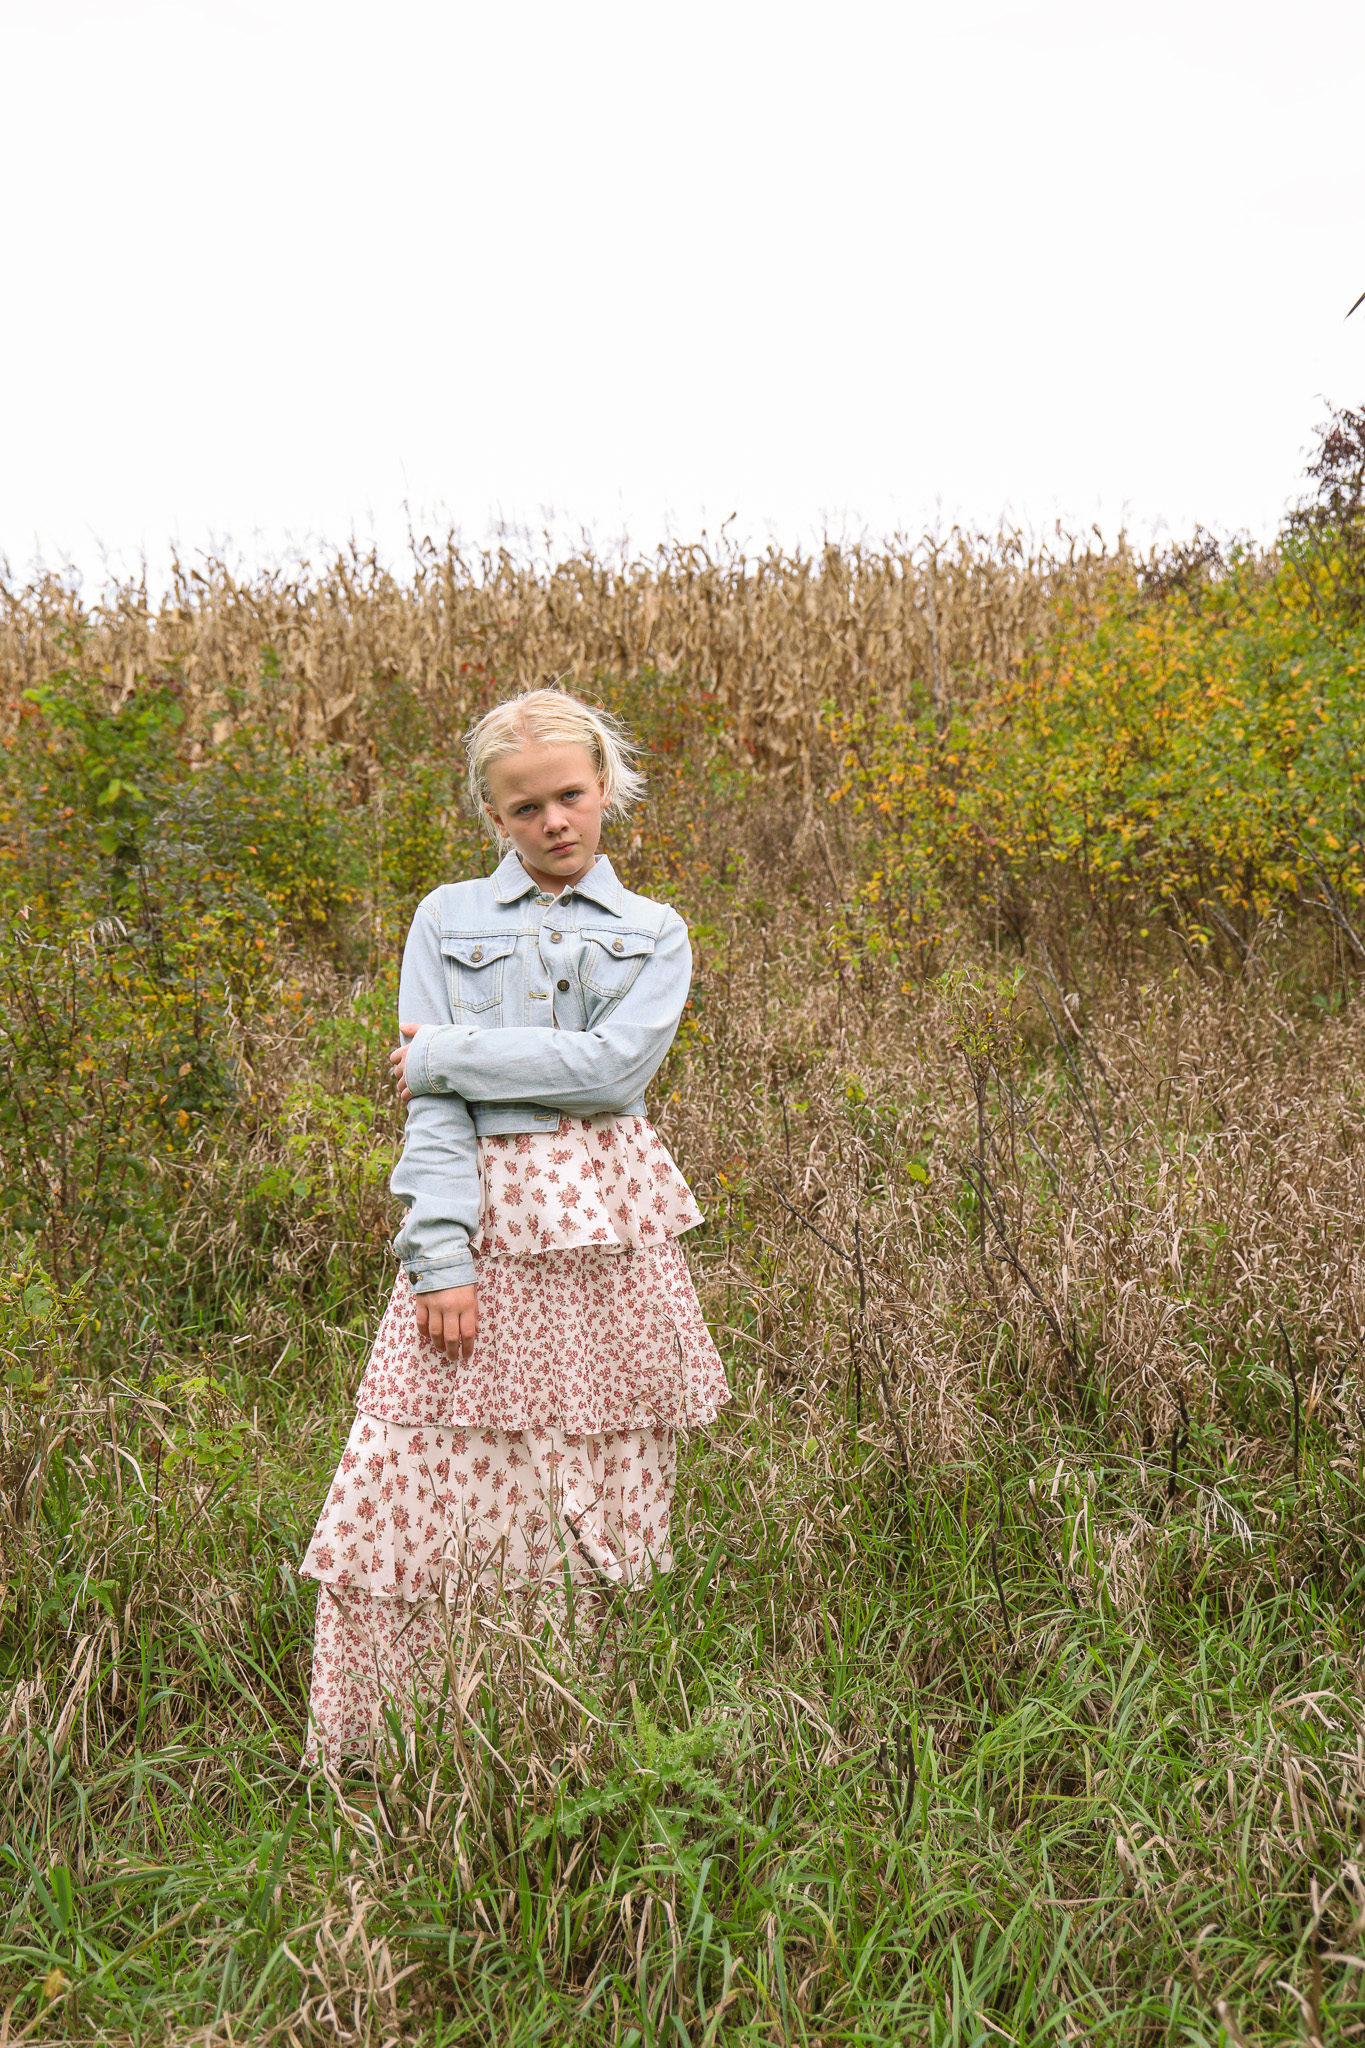
The first photo is straight from the camera. The second is after the three steps above.
05 — FAQ
Lightroom Questions Beginners Ask
What should I edit first in Lightroom?
Start with the light: exposure, contrast and shadows. Once the photo is bright and balanced, move on to colors, and save the brush for small spots at the end.
What is the difference between vibrance and saturation?
Vibrance boosts the quieter, more muted colors and leaves already-bright colors mostly alone. Saturation boosts every color by the same amount, so a little goes a long way. In this photo I used Vibrance +19 and Saturation only +1.
Is Lightroom good for beginners?
Yes. The sliders are labeled, and every edit can be undone, so you can experiment without ruining your original photo. Start with the three steps above and add more tools as you get comfortable.
“Don’t be afraid to think outside the box!”
Keep learning